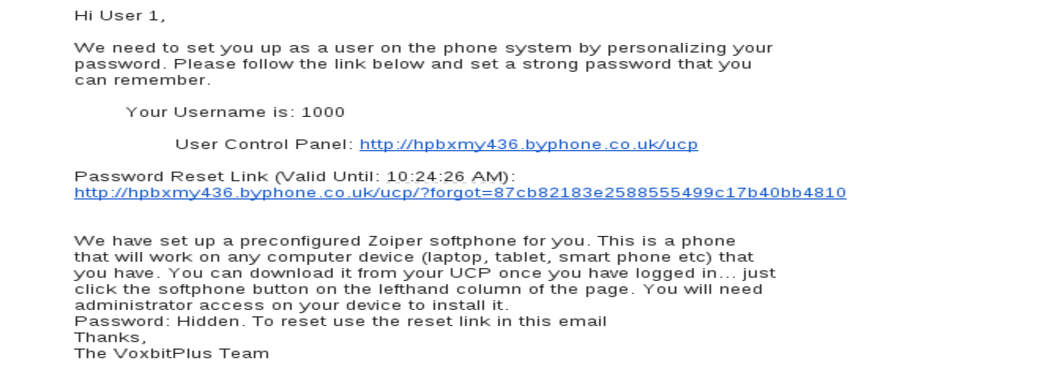
You should receive an email from the system, which allows you to personalize your password.
Please follow the password link to set a personalized password. In this mail you will also see your user name and a link to the system user page.
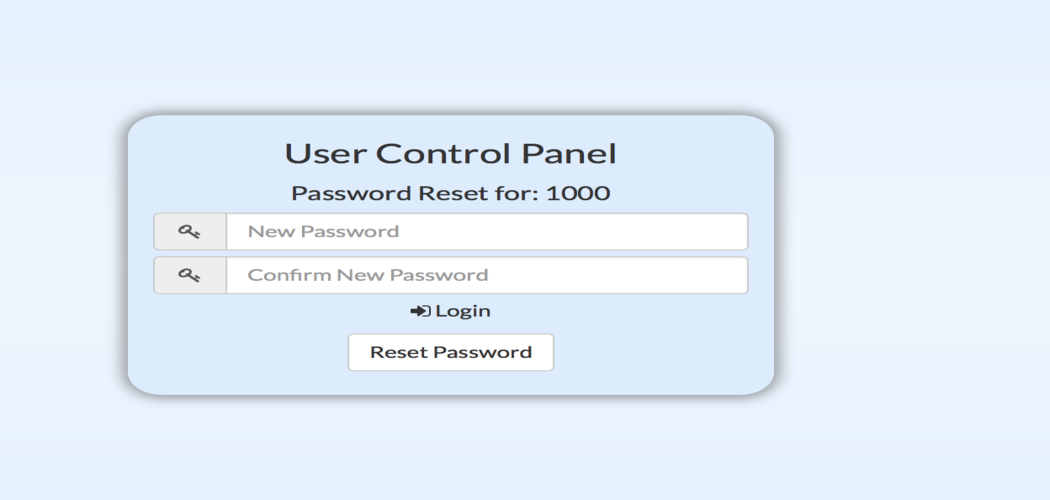
The password link should bring you through to the following screen, where you will enter a new password that suits you.
Once you reset the screen you should get the following login page.
Note your user name. Normally its your extension number and it is also in the email you were sent when you set up the system.
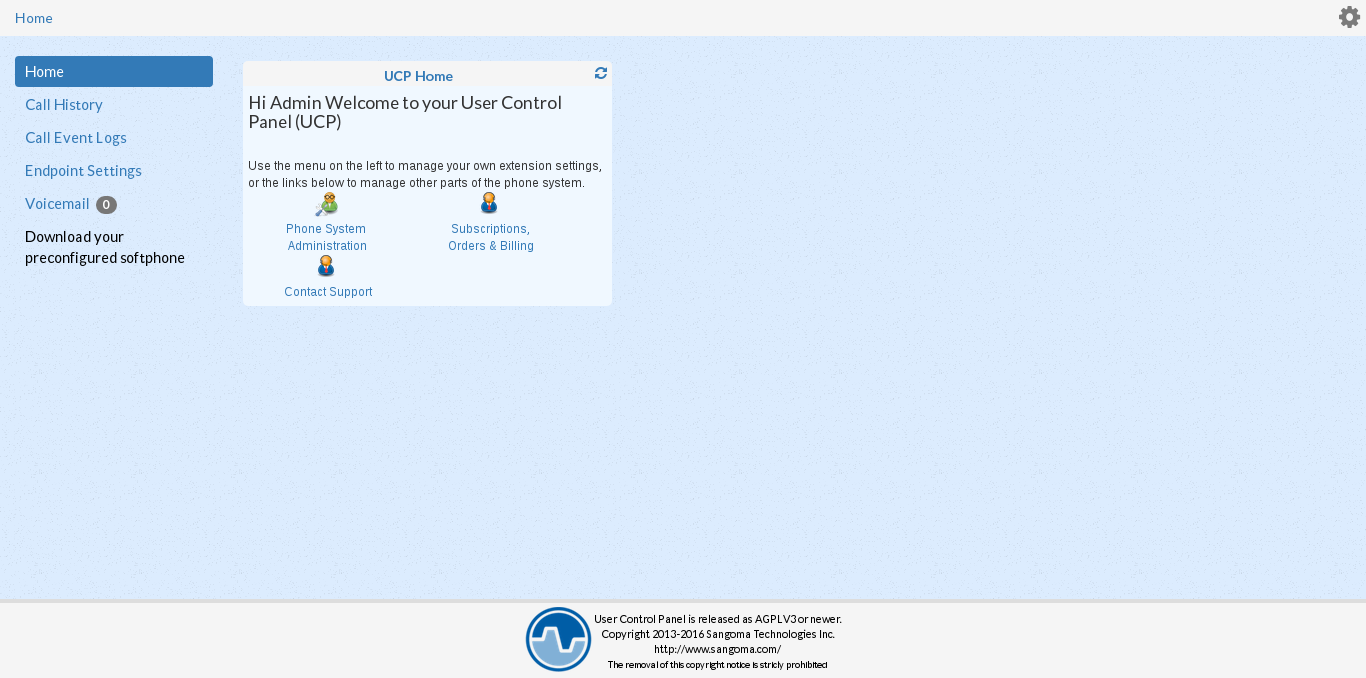
Once you login you should land on the user management page that each user gets. Welcome you are now in the system. Let's move onto downloading the softphone.
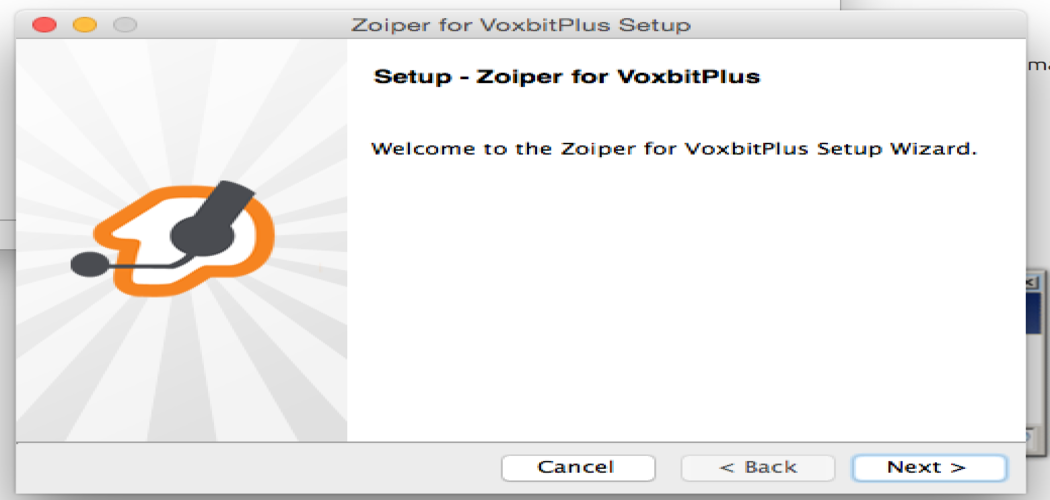
Softphone Download
Use the link on the lefthand side of the user page to download the softphone.
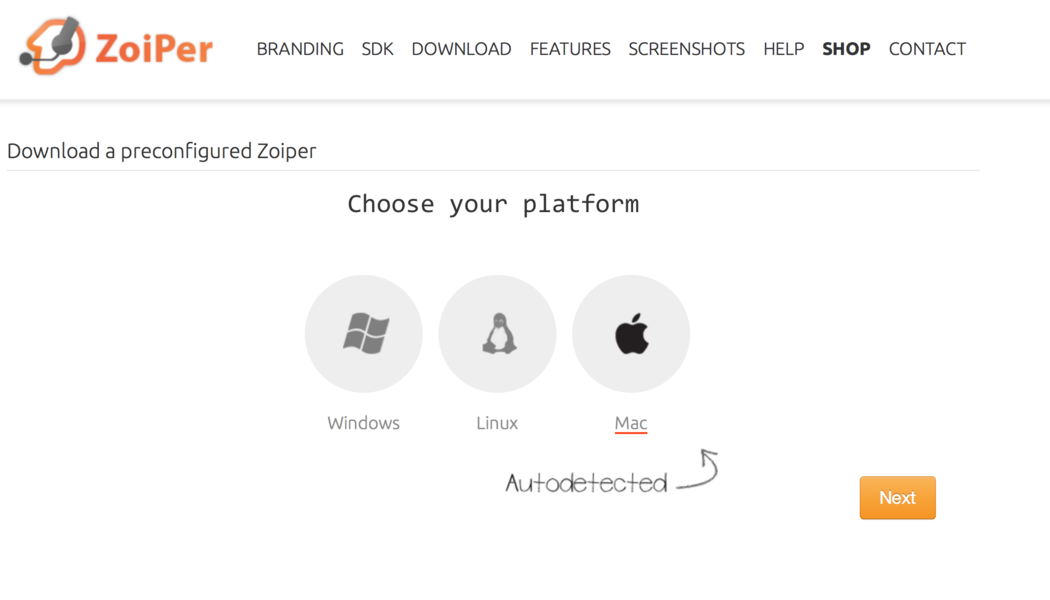
The page should recognize your operating system and all you have to do is click next. If it doesn't just select your operating system and click next.
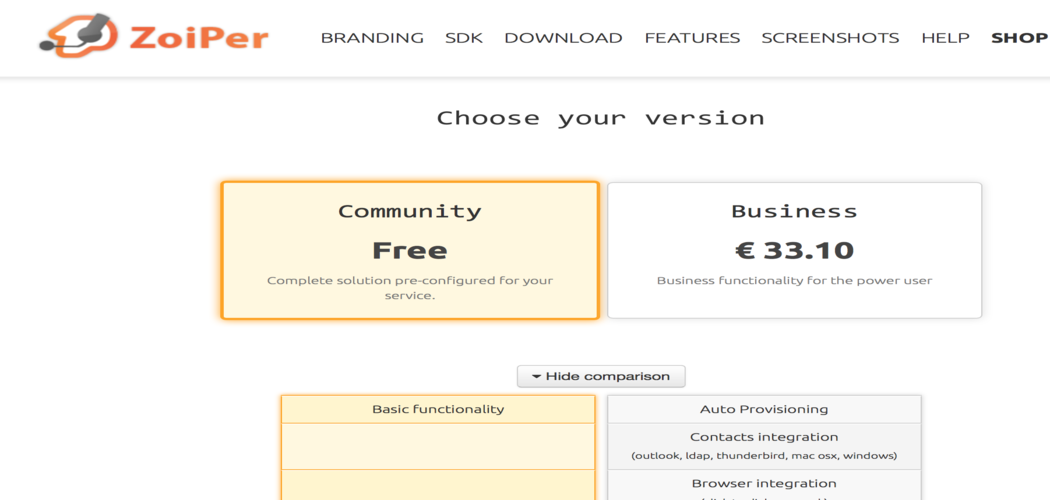
Select the community or free version of the software. The system has all the functionality that you need.
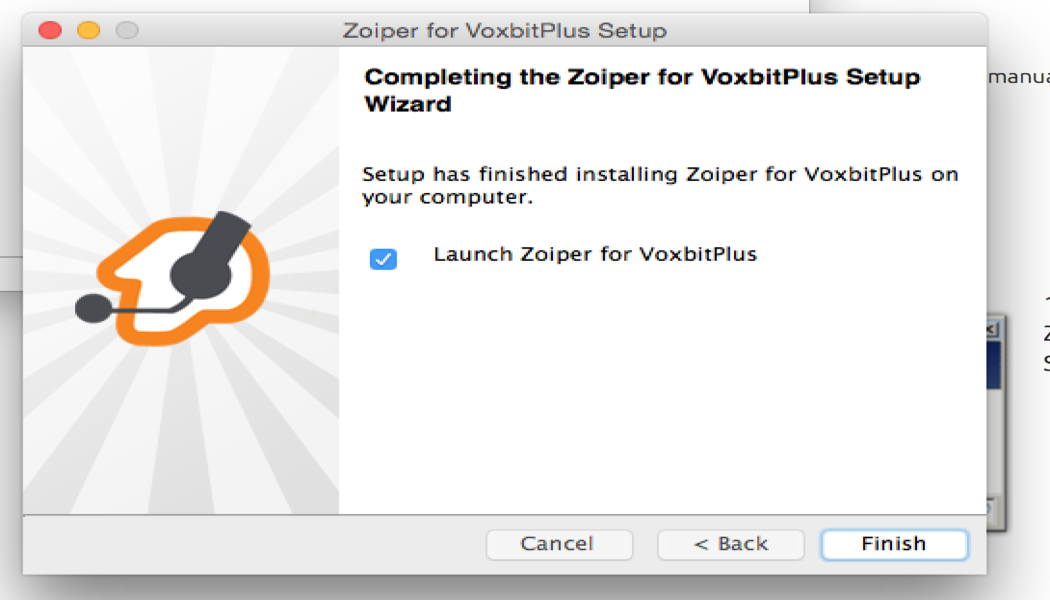
Once the download has completed, install the software on your machine. Please note that you will need administrative privileges to do this.
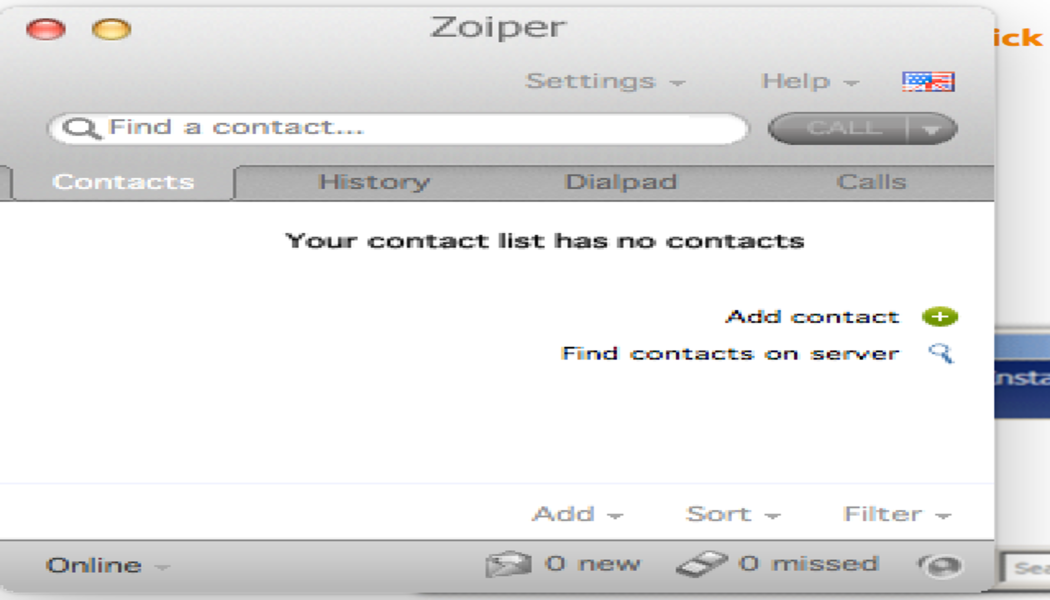
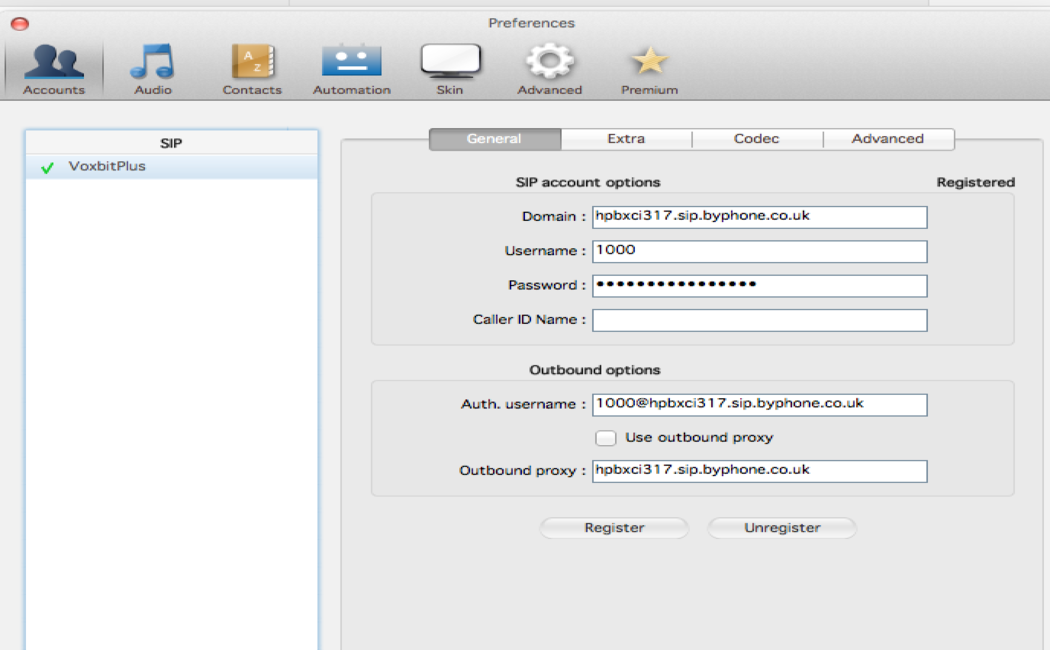
Once it is installed the Softphone client should look something like this.
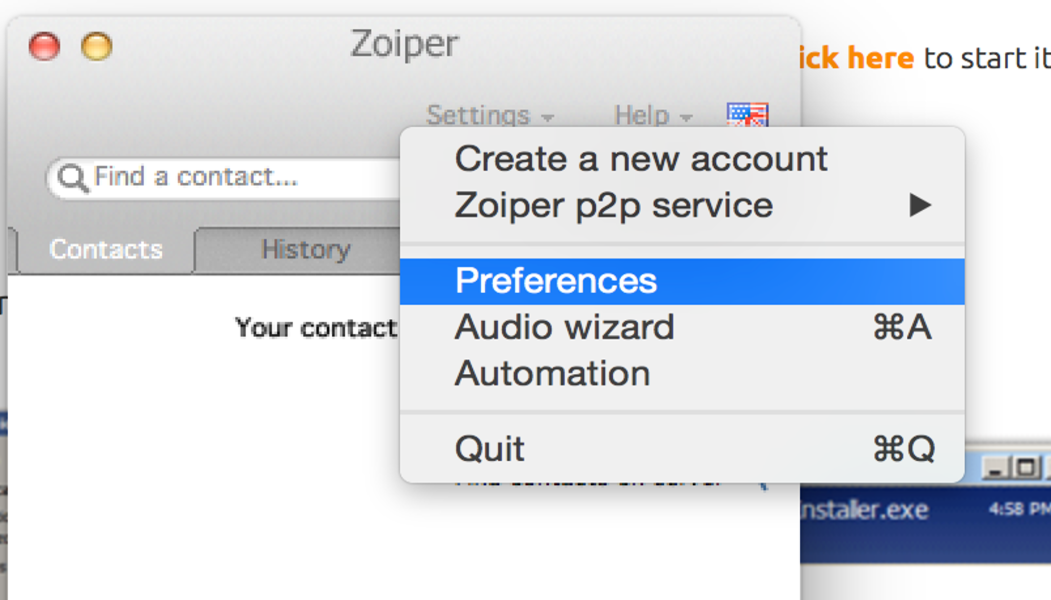
You can check if your softphone has configured properly by going to the Preferences section within Settings and checking that these settings have entered properly.
Admin Login
As administrator (s) you have access to all the settings on the phone system.
There are two ways to log in as an administrator.
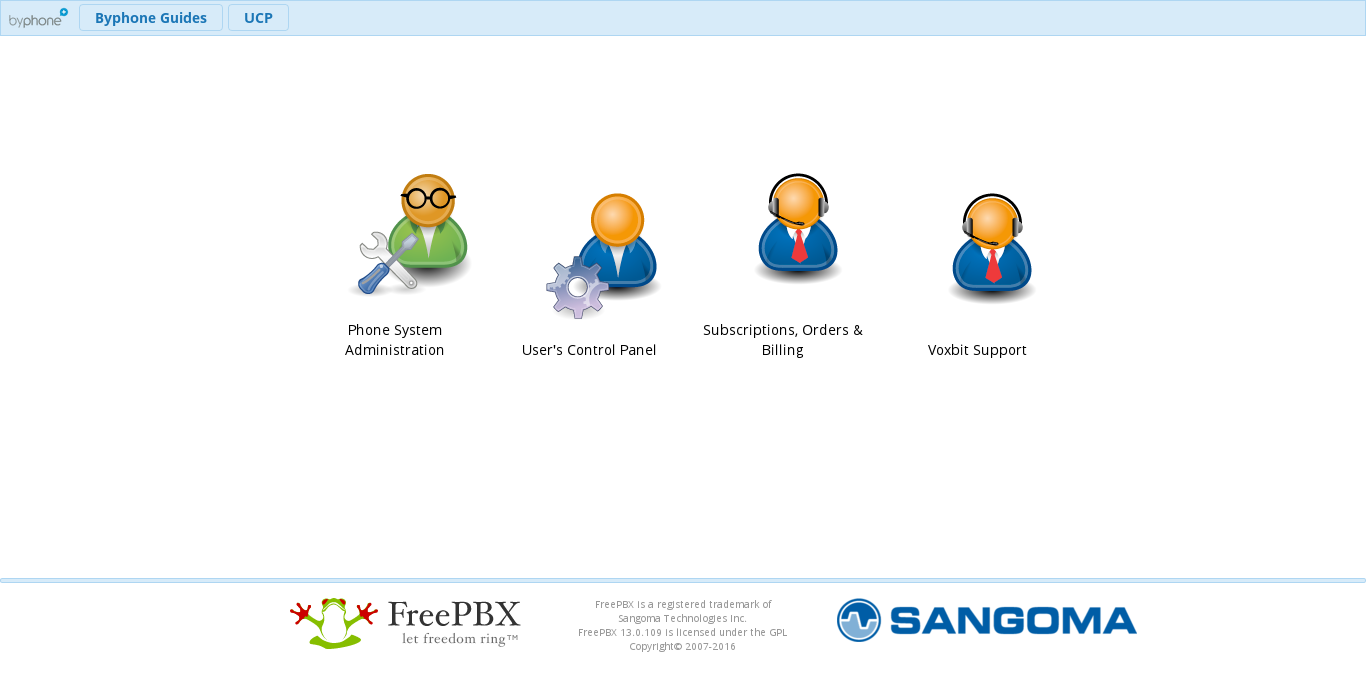
You can access the administration pages through the "Phone System Administration" button on the UCP page.
You then select the icon on the left handside. Phone system administration.
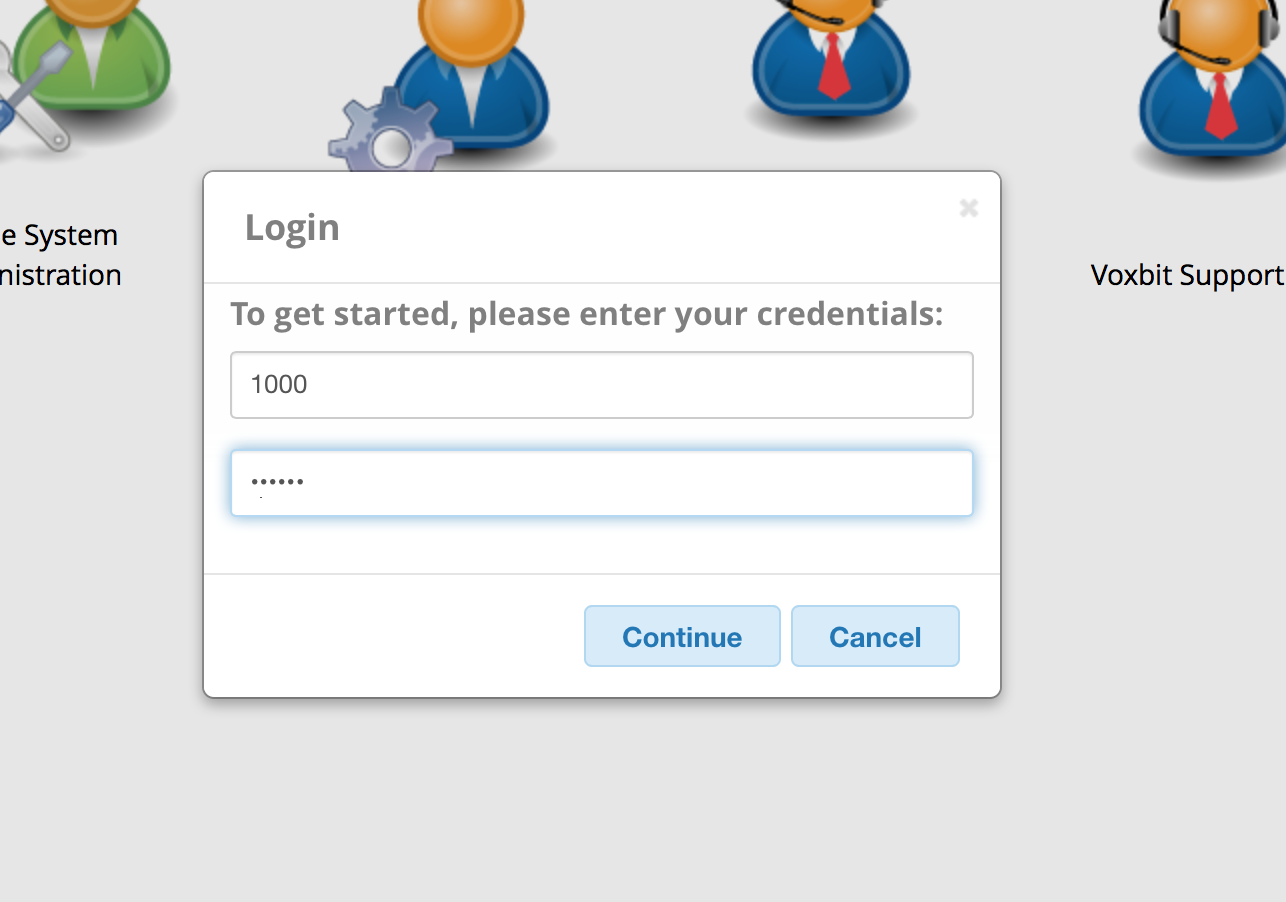
Your username and password are the same as they are to login in as an ordinary user.
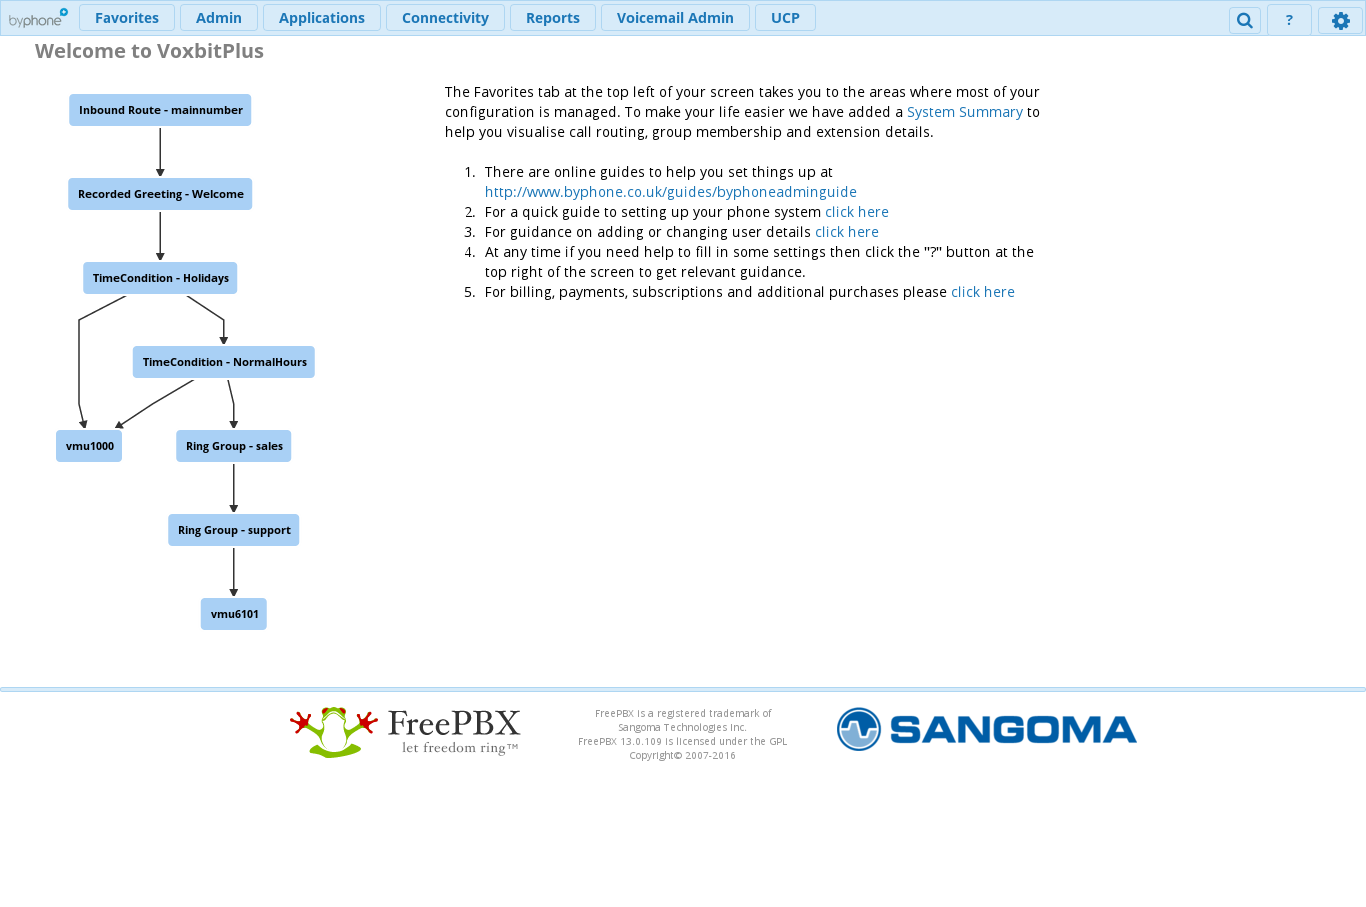
Welcome you are now logged in as the Administrator.
Alternative login
You can login into the system following the link in the mail we sent you.
The link is the one that has the name of your system.co.uk/admin
You then login in as above.
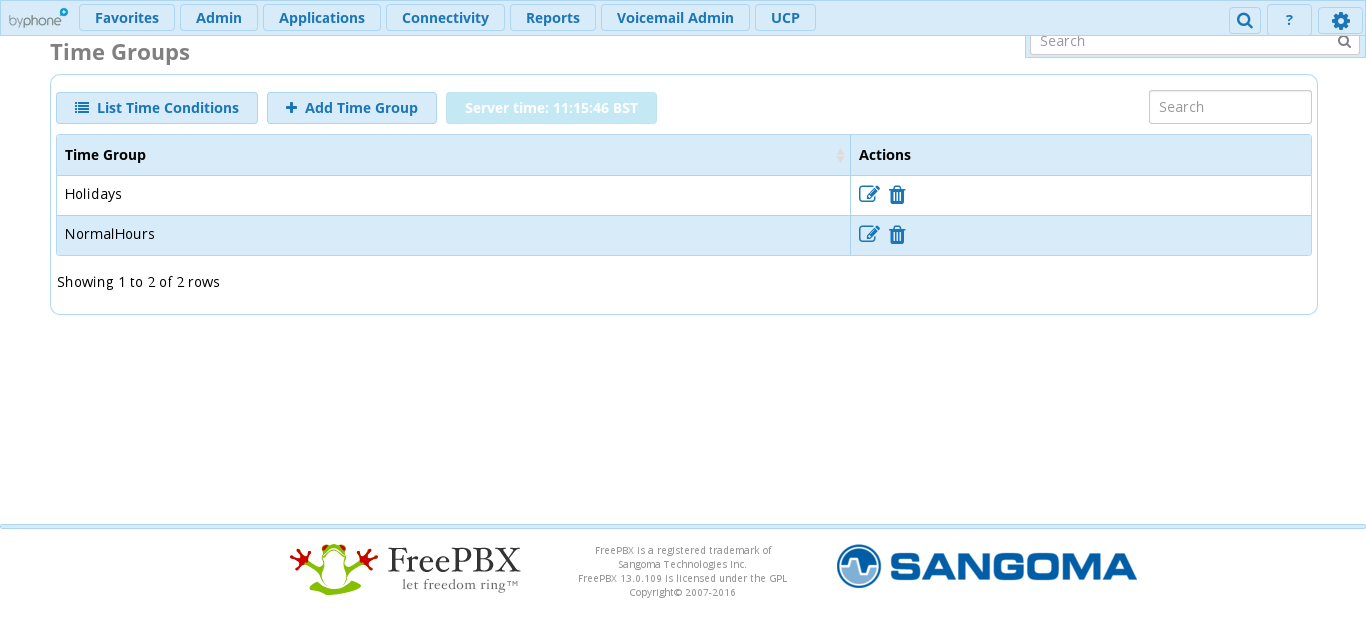
Time Settings
A Time Group is a list of times against which incoming or outgoing calls are checked. Time groups typically are associated with time conditions, which control the destination of a call based on the time.
Your system comes with pre built time groups assigned and you may need to change the times that your business is open/closed
As you can now log in to the management page, from the top menu click Applications - In the drop down click Time Groups
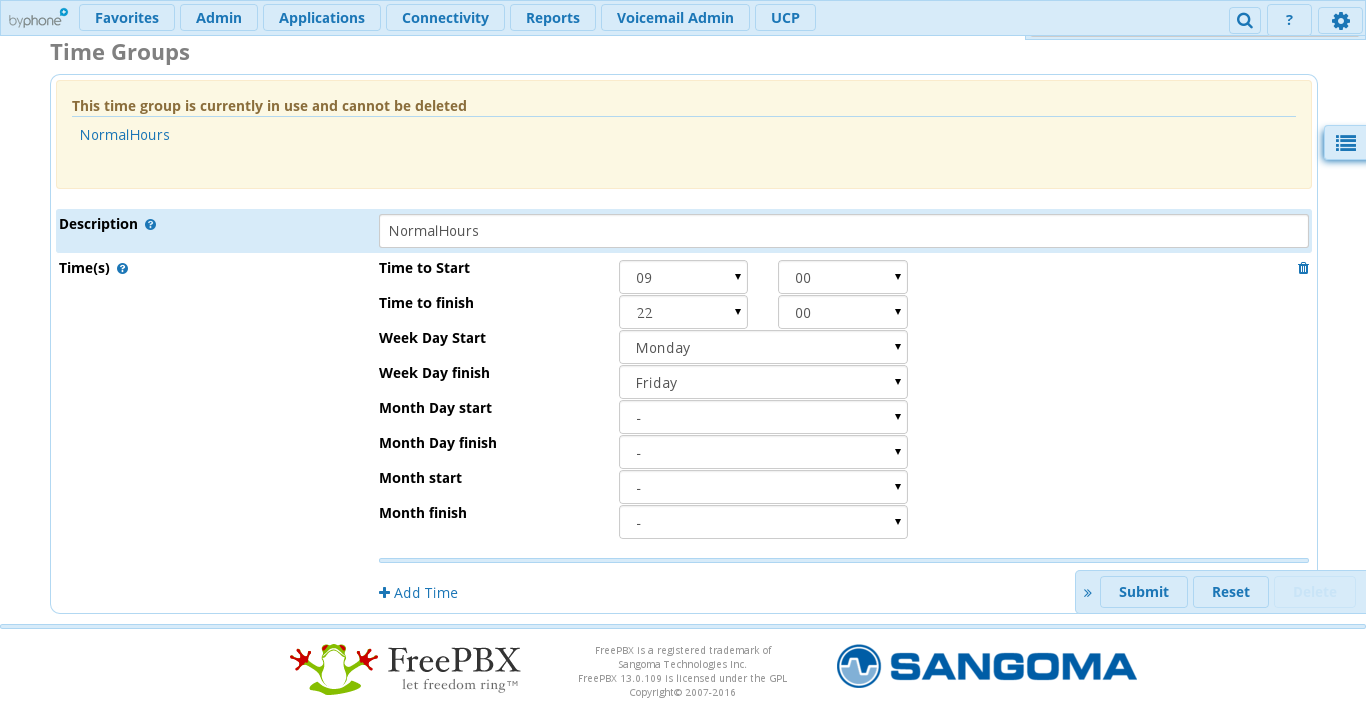
To change your business times click the edit button beside the "Normal Hours" time group entry
Within this window you can edit your opening and closing times along with the days of the week that your business is open.
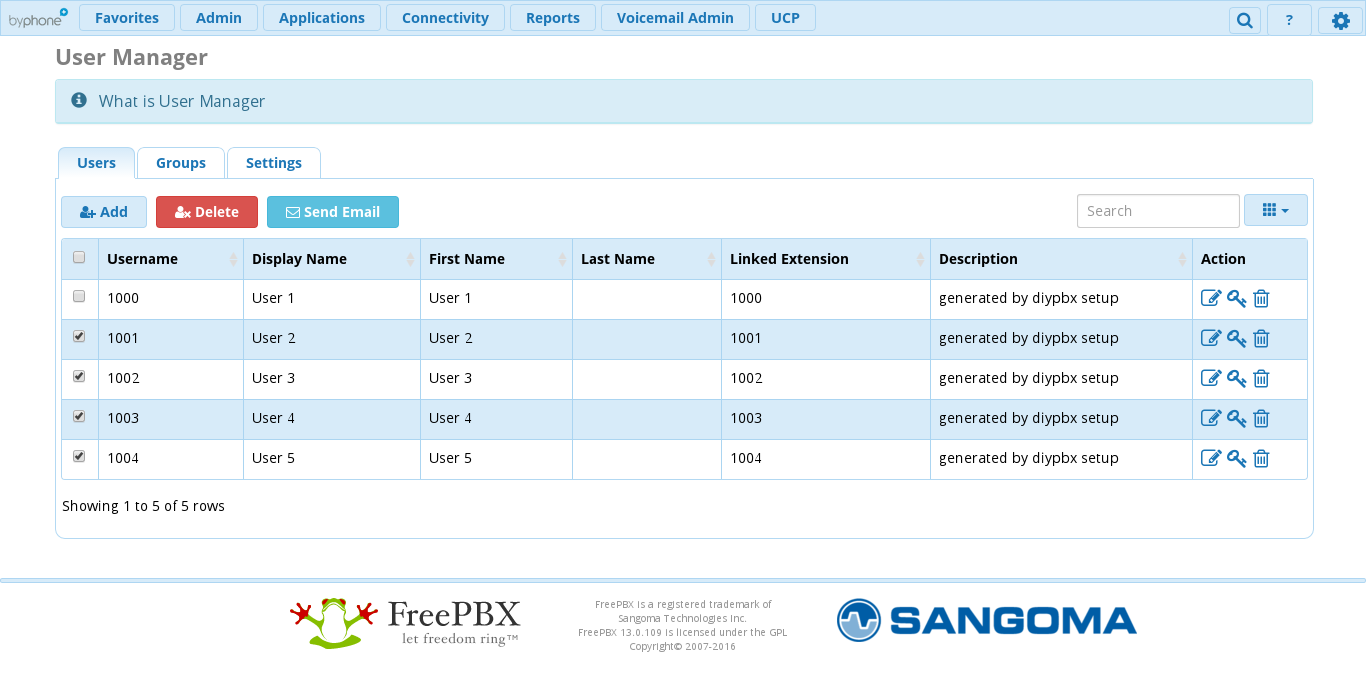
Activating Users
You need to invite each user onto the system by sending them their login details.
They can then set up the Softphone and any other configuration changes that they need to make.
As you can now log in to the management page, from the top menu click Favourites - In the drop down click User Management
Select the users you want to invite onto the system, by ticking the box on the left of the username column.
You then send the email by clicking on the blue "Send Email" button just above the user table.
Each user can now create their own password.
They can then control their own follow me settings and voicemail settings if they wish.
Voicemail
You can manage your voicemail in two ways. Through the web interface or through the phone system and a connected extension (phone).
Through the Web browser.
Login into the system, the web address is in the email that you received when you changed your password.
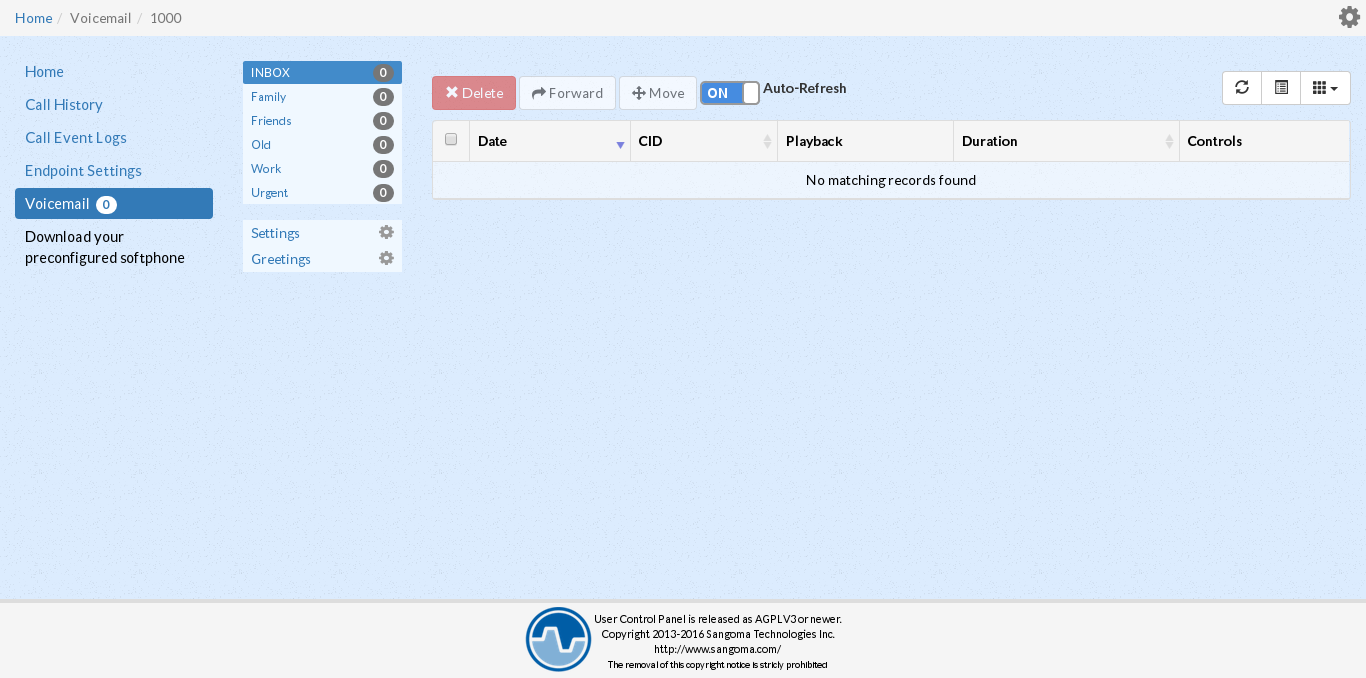
Once you have logged you should see a screen like this. Select the voicemail option.
Select the settings option.
The voicemail PIN is your voicemail password when you are dialing into receive your voicemail.
The email address is the mail that the system will send you your voicemail as sound files.
Make sure that the email attachment toggle underneath is turned on.
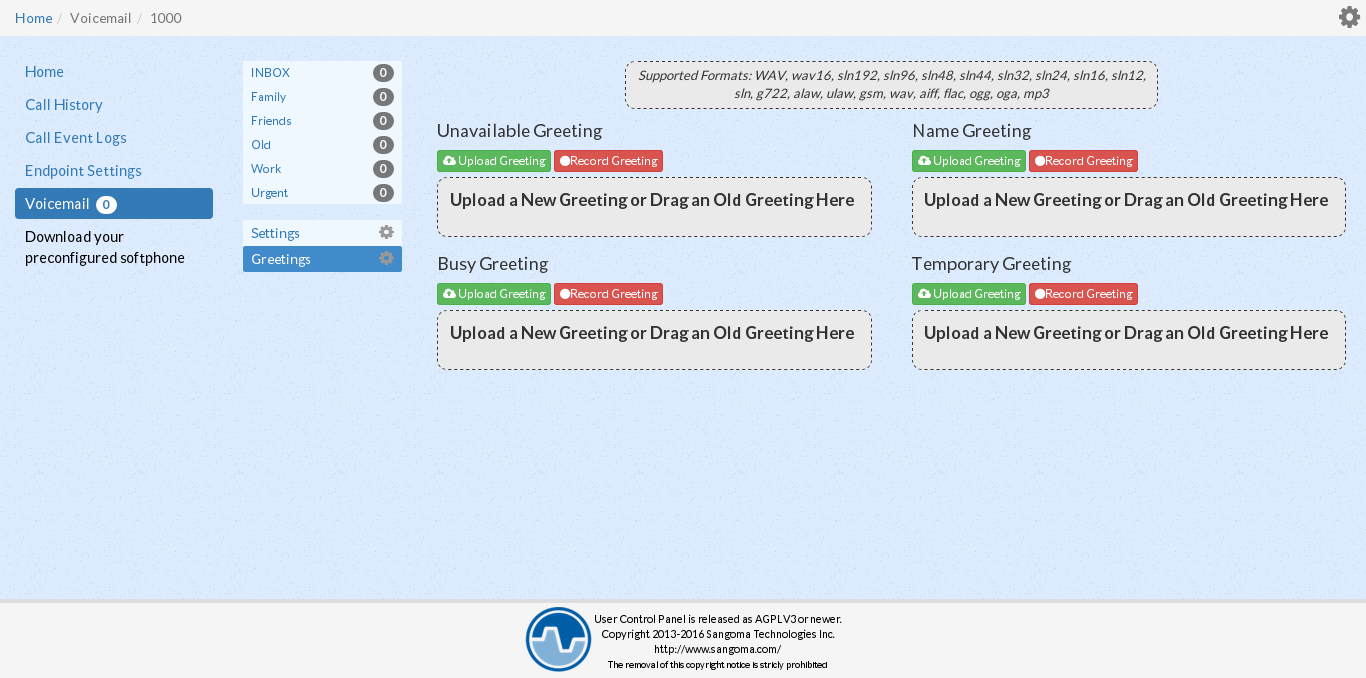
To change the greeting, you select greeting button underneath the settings button.
Then either upload your prerecorded message, or certain browsers like Chrome will allow you
to record your message directly. There are four possible messages you might want to record.
Through the Key pad
Dial Pad or phone
Dialing *97 to access your messages.
You will also need to input your password which is the same as your user name.
Or...
Login in by dialing *98 from any office phone
Enter your extension when prompted, then your password when prompted.
You may press # after each entry if you wish or just wait for your entry to be accepted.
Once logged in to the voicemail you can select from a range of menus that cover recording greetings etc.
The main menu will be the first menu you hear when you have logged in. Here are the main menu options:
1 - Listen to new messages or listen to old messages if there are no new messages
2 - Change folders
3 - Advanced options
0 - Mailbox options
* - Help (repeat the menu options)
# - Exit from the voice mail system
The First Time You Log In
The first time that you log into your mailbox, you should record your unavailable greeting
Record your unavailable greeting
Log into your mailbox, then press 0 followed by 1 (for your unavailable greeting), when finished recording press # to end the recording.
After a recording, press 1 to Accept, 2 to Review, or 3 to Re-record.
That's it, you should now have a working telephone system!