A system recording is the sound file that is applied to an announcment, the announcement can then be applied to Ring groups, IVR's etc.
This section defines how to create your system recording.
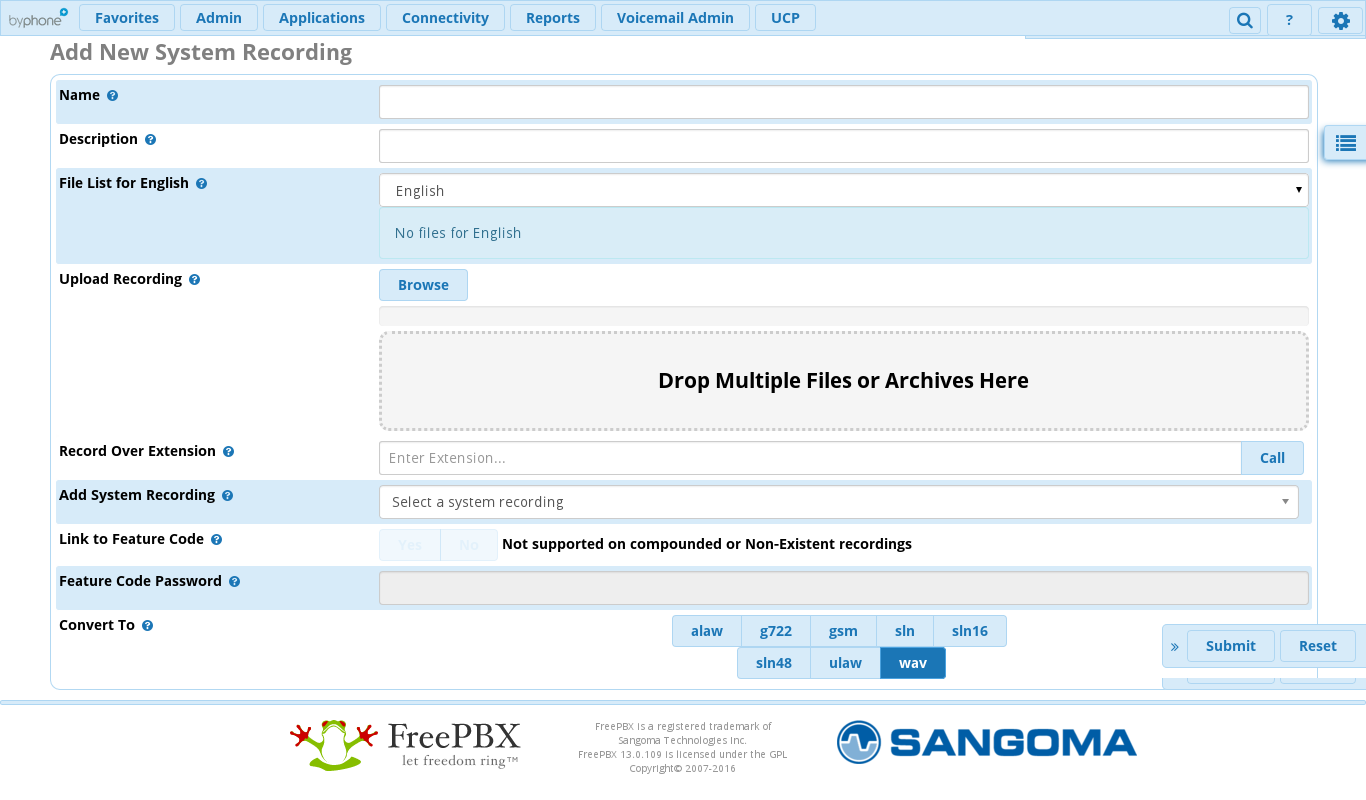
How to create a System Recording
Go to Favourites
Go to System Recordings
Click Add Recording button
In the Name field - add a relevant name
In the Description field - add a relevant description
In File List For English field - select from the drop down list - Sortable File List/Play order. The playback will be done starting from the top to the bottom. You can click the play icon to preview the files. If a file is red it is missing for said selected language. Files can be replaced by clicking them once (which will turn them green) placing them into replace mode. Anything you upload will then replace this file on save.
In the Upload Recording field - Upload files from your local system. Supported upload formats are: WAV, aiff, alaw, flac, g722, gsm, mp3, oga, ogg, sln, sln12, sln16, sln192, sln24, sln32, sln44, sln48, sln96, ulaw, wav, wav16, wav49. This includes archives (that include multiple files) and multiple files.
You can click on the "Browse" button to obtain a file from your machine
In the Record Over Extension Field - The system will call the extension you specify to the left. Upon hangup you will be able to name the file and it will be placed in the list above.
In the Add System Recording field - from the drop down box - Add any previously created system recording or a recording that was added previously.
In the Link To Feature Code field - click the (Yes) button to create an options feature code that will allow this recording to be changed directly (Note this feature is supported on compounded or Non-Existent recordings)
In the Feature Code Password field - Optional - Add a password to protect access to this feature code which allows a user to re-record it.
In the Convert To field - Check all file formats you would like this system recording to be encoded into.
Click on the Submit Information button at the bottom right of the page.
Click on the Apply Config button at the top right of the page.